Work with dashboard
You can work with dashboard: edit and customize it depending on your needs.
Permissions
To be able to customize a dashboard, you need the dashboard/customize policy.
By default, all users belonging to the Editors User Group have the Dashboard role assigned, so that they can edit, create, or delete a dashboard.
If, by any reason, you want to narrow this permission, you can set up specific limitations.
For more information about setting up a permission system, see Work with permissions.
Customize dashboard
To customize the dashboard, on the main page, click Customize dashboard.

If the banner is closed, click the three dots icon, and use the Customize dashboard action.
![]()
This action opens an online editor - Dashboard Builder.

Dashboard Builder interface
Dashboard Builder user interface consists of:
A. Drop zone
B. Elements / Structure view toolbar
C. Buttons:
| Name | Icon | Use |
|---|---|---|
| Fields |  |
Edit dashboard name. |
| Switch layout |  |
Switch layout for the dashboard. |
| Undo |  |
Undo latest change. |
| Redo |  |
Redo latest change. |
| Structure view |  |
Access Structure view toolbar. |
| Elements menu |  |
Access Elements toolbar. |
| View switch |  |
Move Elements / Structure toolbar to the other side of the screen. |
Dashboard Builder has two main toolbars that you can use while creating a dashboard:
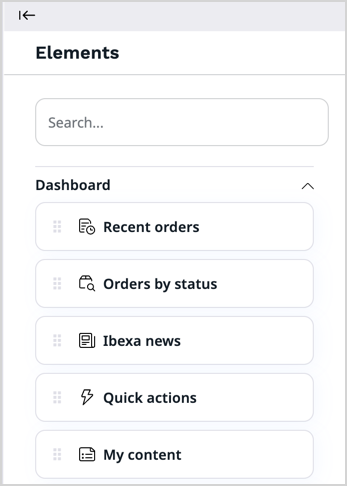
- Elements - consists of all available blocks that you can use by dragging them and dropping on a drop zone.
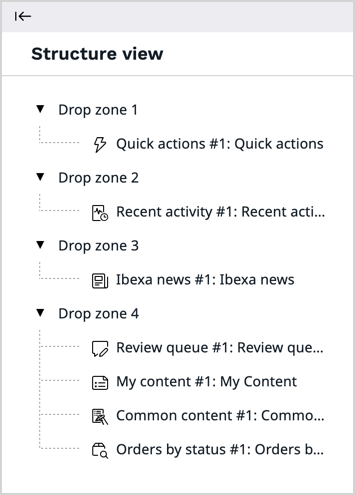
- Structure view - shows a structure of your dashboard, including its division into zones and the blocks that they contain.
Choose layout
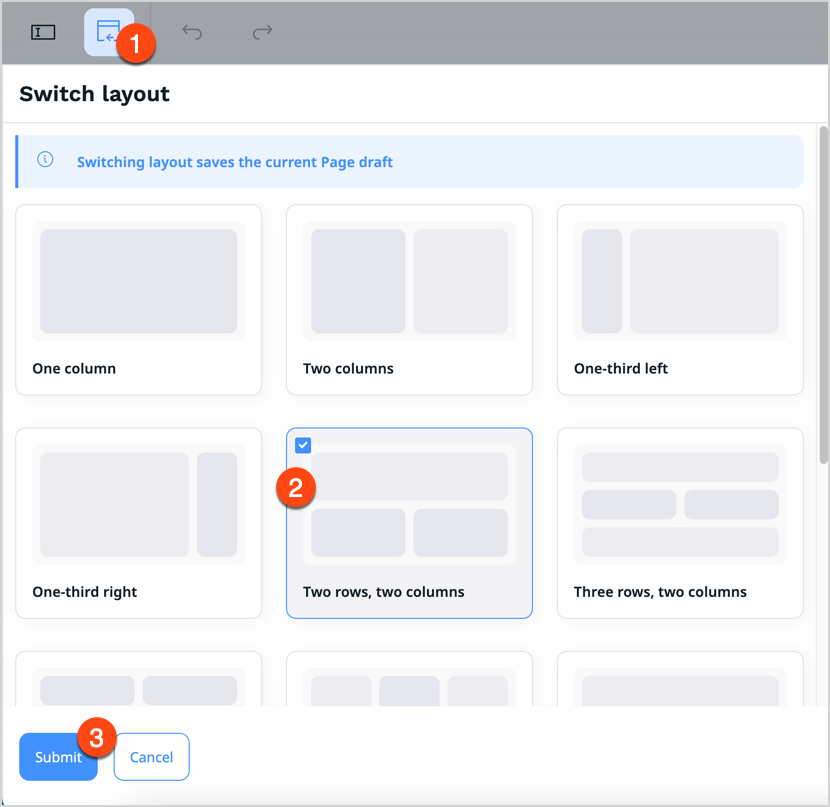
For a new dashboard you can choose layout which defines the available zones and helps to organize the dashboard view. Applying a layout divides the dashboard into the defined zones. The zones are placeholders for blocks.
To do it, click the Switch layout icon on the left side of the upper toolbar, then choose one from available layouts, and click Submit.
Add blocks
In Dashboard Builder, you can access a menu of Elements, which includes a set of blocks of content that you can add to the zones of the dashboard.
Tip
For a list of available blocks and their detailed description, see Dashboard block reference.
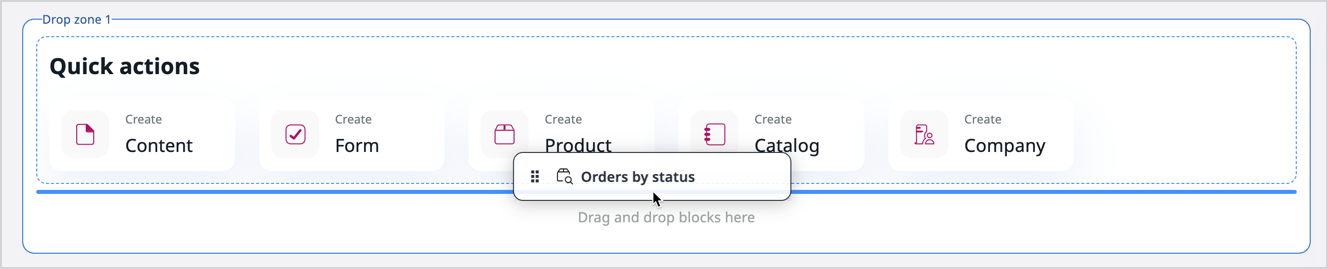
Add a block by dragging it from the menu to an empty place on a zone. Do not worry about placing blocks in the proper place from the start. You can reorder them at any time by dragging and dropping them in the desired location. You can reorder blocks in a few ways:
- drag and drop block in the desired location on a drop zone
- use Move up block or Move down block option from the block toolbar
- access Structure view and use 'Move up' and 'Move down' function in the settings of the block
When you add a new block to the drop zone, drop it in the blue highlighted area. Before you drop it, a bold line appears - it helps you see the position of the newly added block in relation to other, already added blocks.
When you add a block by dragging it from Elements menu into the drop zone, the block settings panel open immediately where you can configure all block properties.
This is a default behavior. You can globally turn off automatic opening of the block settings panel in the user settings. First, access your user settings on the right side of the top bar:

Then, go to Preferences tab, Edit section.
Here, you can find Automatically open block settings in builder setting, which is enabled by default.
To change this behavior, click on Edit icon, find the setting, and change its value to disabled.

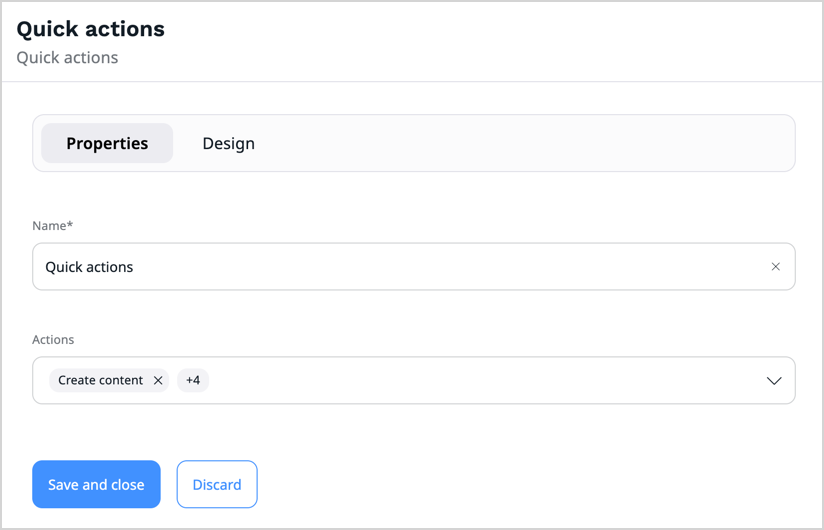
Work with blocks
Each block has its special properties. You can access them by placing the cursor on a block in the drop zone and clicking the Block settings icon.

Settings available for blocks are divided into two tabs: Properties and Design. The settings available on the Properties tab depend on to the block's content. For a description of these settings, see Dashboard block reference.
To save changes, click Save and close.
You can also work with the block, for example, duplicate it, change its position, or delete it.
Hover over the block and the toolbar appears. Click the three dots icon to see more options.
The following actions are available:
- Move up block - allows you to change position of the block by moving it up
- Move down block - allows you to change position of the block by moving it down
- Block settings - allows you to access properties window
- Duplicate - duplicates existing block with its settings
- Refresh - refreshes preview of the block
- Delete - deletes existing block

Edit dashboard
At any time you can edit an active customized dashboard. To do it, click the three dots icon in the top right corner, and then click Edit....

This action opens the Dashboard Builder that allows you to edit an active customized dashboard and publish its updated version. All the changes that you make are visible after you save them and go back to the dashboard.
Save dashboard
There are several options for saving work in the Dashboard Builder:
| Option | Description |
|---|---|
| Publish | Publish the dashboard draft. |
| Save draft | Save the dashboard draft. |
| Delete draft | Delete the dashboard draft. |
Select active dashboard
When you create a new customized dashboard, you can choose, which dashboard is set as an active.
To do it, access your user settings on the right side of the top bar. Then, go to Preferences tab, Dashboard section, and click Edit.
Select the dashboard to be set as active, and click Save.

You can also select active dashboard and switch between default and customized dashboard in the main dashboard view. Click the three dots menu and use the Switch to... action.
