Install eZ Enterprise
This page describes how to gain access to commercial packages and security releases when installing eZ Platform Enterprise Edition and eZ Commerce. They are available via updates.ez.no.
Enterprise
To install eZ Enterprise, start with the procedure described in Install eZ Platform.
Because you do not have access to the Enterprise GitHub repositories,
you need to download an archive from the Support Portal, or follow instructions below in order to use composer create-project.
When dealing with software from updates.ez.no, you need to take care of channels and authentication:
Select correct updates.ez.no channel(s)
The following channels are available:
- Trial (limited access to try for up to 120 days):
- Enterprise Business User License (requires valid subscription):
Once you have set up authentication below, the links above give you access to see the available packages and releases.
Set up authentication tokens
eZ Enterprise subscribers have access to commercial packages at updates.ez.no/bul/. The site is password-protected. You will need to set up authentication tokens to get access to it.
Log in to your service portal on support.ez.no, go to your Service Portal, and look for the following on the Maintenance and Support agreement details screen:

- Select Create token (this requires the Portal administrator access level).
- Fill in a label describing the use of the token. This will allow you to revoke access later.
- Save the password, you will not get access to it again!
Save authentication token in auth.json to avoid repeatedly typing it
Composer will ask to do this for you on updates.
If you prefer, you can decline and create an auth.json file globally
in COMPOSER_HOME directory for machine-wide use:
1 | |
To store your credentials per project, add the credentials to the COMPOSER_AUTH variable:
1 | |
You then need to add the contents of this variable to auth.json.
eZ Platform Cloud
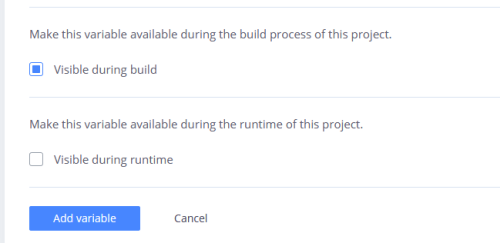
If you are using Platform.sh, you can set the token as an environment variable.
When you do, make sure the Visible during runtime box in Platform.sh configuration is unchecked. This will ensure that the token is not exposed.
After this, when running Composer to get updates, you will be asked for a username and password. Use:
- as username – your Installation key found on the Maintenance and Support agreement details page in the service portal
- as password – the token password you retrieved in step 3.
Authentication token validation delay
You can encounter some delay between creating the token and being able to use it in Composer. It might take up to 15 minutes.
Support agreement expiry
If your Support agreement expires, your authentication token(s) will no longer work. They will become active again if the agreement is renewed, but this process may take up to 24 hours. (If the agreement is renewed before the expiry date, there will be no disruption of service.)
Create project
In order to install a new project using composer create-project to get latest version of eZ Enterprise,
you'll need to tell Composer which token to use before the project folder is created in the first place.
This can be done in the following way:
1 | |
Authentication token
If you added credentials to the COMPOSER_AUTH variable,
at this point add this variable to auth.json (for example, by running echo $COMPOSER_AUTH > auth.json).
Usage of authentication token with composer create-project
If you have several projects set up on your machine,
they should all use different tokens set in auth.json file in project directory.
Moving from trial
If you started with a trial installation, you should adjust the channel(s) you use in order to get software under BUL license instead of a TTL license.
Edit composer.json
Edit composer.json in your project root and change the URL defined in the repositories section to point to the bul* URLs listed above.
Once that is done, you can execute composer update to get packages with the correct license.
Note
You can now refer back to Installing eZ Platform for finishing steps of the installation process.
Enable Date-based Publisher
To enable delayed publishing of Content using the Date-based Publisher, you need to set up cron to run the command bin/console ezstudio:scheduled:publish periodically.
For example, to check for publishing every minute, add the following script:
echo '* * * * * cd [path-to-ezplatform]; php bin/console ezplatform:cron:run --quiet --env=prod' > ezp_cron.txt
For 5-minute intervals:
echo '*/5 * * * * cd [path-to-ezplatform]; php bin/console ezplatform:cron:run --quiet --env=prod' > ezp_cron.txt
Next, append the new cron to user's crontab without destroying existing crons.
Assuming the web server user data is www-data:
crontab -u www-data -l|cat - ezp_cron.txt | crontab -u www-data -
Finally, remove the temporary file:
rm ezp_cron.txt